
Adding a MapCosmos store locator to your Salesforce-powered website or portal is simple with just a few steps.
The MapCosmos widget for Salesforce helps you increase engagement, drive in-store visits, and build trust by giving your visitors the ability to:
👉 Haven’t created your widget yet? Follow our setup guide on how to configure a MapCosmos store locator first.
Depending on how you’re using Salesforce (Experience Cloud / Sites / Lightning Pages), you can add the code in a few ways:

Create a new Visualforce page
Paste your MapCosmos embed code directly inside the <apex:page> container
Save and assign the page to the relevant menu item.
That’s it — you’ve successfully embedded a fully interactive store locator inside Salesforce.
Now your visitors can:
✅ Locate your nearest branches or partners instantly
✅ Access live directions in one tap
✅ Filter results by service type, category, or your own custom fields
✅ Read detailed store information
✅ Enjoy a seamless transition between online and offline experiences
🚀 Start using MapCosmos for free today and bring a customizable, performance-driven store locator to your Salesforce portal, app, or website.
This guide explains how to add MapCosmos to Salesforce in three simple steps - with instructions for both Aura (Visualforce) and LWR (Lightning Web Runtime) sites.
From your MapCosmos dashboard, open your widget and click “Installation Code” in the settings. Copy the installation code provided.
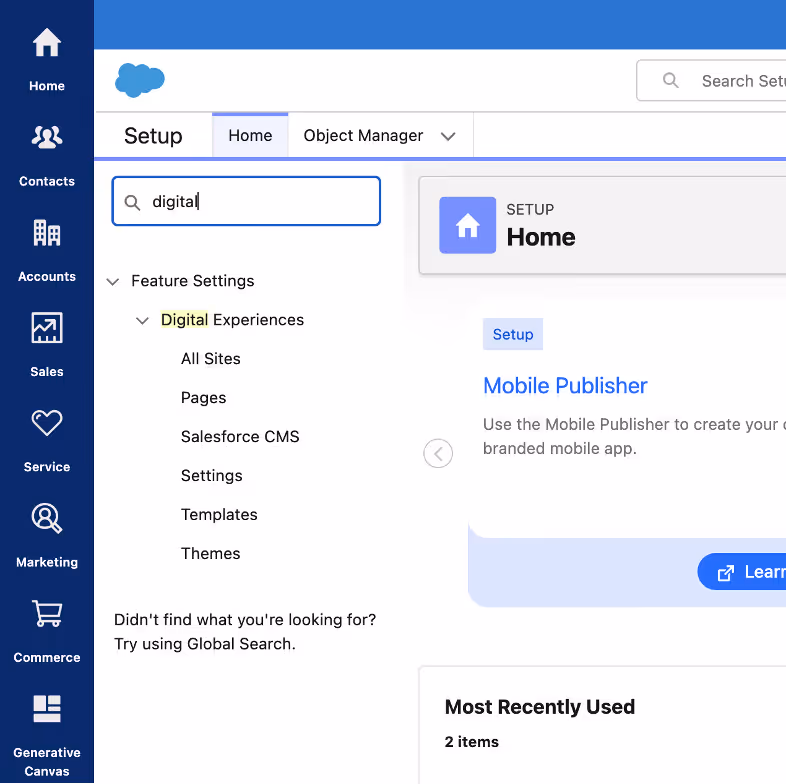
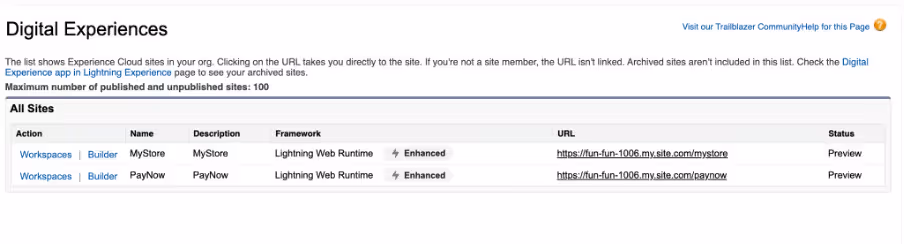
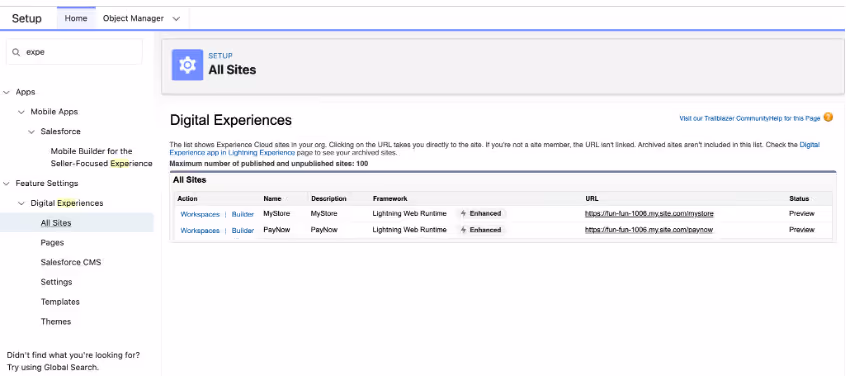
You can check if you’re on LWR or Aura by going to Advanced Settings → Digital Experience → All Sites
In the left-hand panel
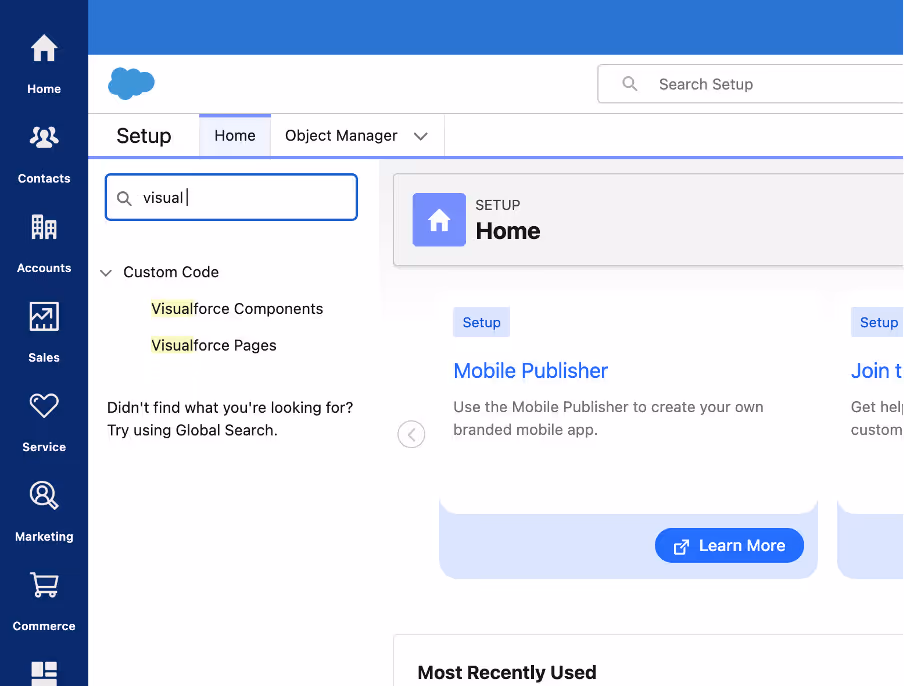
In Salesforce Admin, go to Quick Settings → Advanced Setup → Visualforce Pages → New
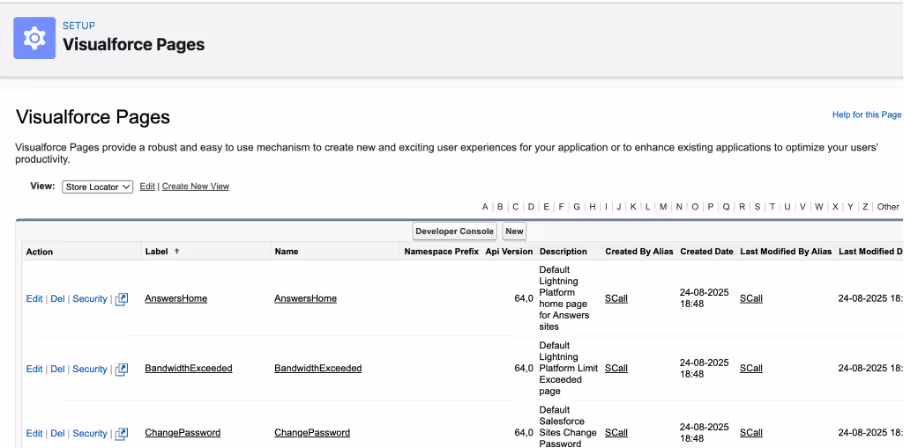
Give your page a name (e.g., StoreLocatorPage / Wheretofindus)
Paste your MapCosmos installation code into the editor, for example:
<apex:page>
<script type="text/javascript" src="https://widget.mapcosmos.com/map-widget.js?key=WIDGET_KEY" async></script>
</apex:page>
👉 The <apex:page> wrapper is required — every Visualforce Page must start and end with it.
mapCosmosLocator.html

 <template>
  <div id="map-cosmos-map-widget" data-widget-id="YOUR_WIDGET_ID"></div>
</template>
 mapCosmosLocator.js

 import { LightningElement } from 'lwc';

export default class MapCosmosLocator extends LightningElement {
  renderedCallback() {
    if (this._loaded) return;
    this._loaded = true;

    const script = document.createElement('script');
    script.type = 'module';
    script.src = 'https://files.tgb-pro.com/map-widget.js';
    script.onload = () => {
      // script loaded – the widget will attach to the DIV via its own init
    };
    this.template.appendChild(script);
  }
}
 mapCosmosLocator.js-meta.xml

 <?xml version="1.0" encoding="UTF-8"?>
<LightningComponentBundle xmlns="http://soap.sforce.com/2006/04/metadata">
  <apiVersion>61.0</apiVersion>
  <isExposed>true</isExposed>
  <targets>
    <target>lightning__AppPage</target>
    <target>lightning__RecordPage</target>
    <target>lightning__HomePage</target>
    <target>lightningCommunity__Page</target>
  </targets>
</LightningComponentBundle>
5. Save and publish 🚀
That’s it! Your MapCosmos Store Locator is now live in Salesforce.
Now your visitors can:
✅ Find the nearest store or partner with just a few clicks
✅ Get real-time directions on desktop or mobile
✅ Search by products, categories, services, or your own custom fields
✅ Access detailed store information like hours, accessibility, and downloads
✅ Connect more closely with your brand offline
🚀 Get started with MapCosmos for free today and add a powerful, fully customizable store locator to your Salesforce portal, Experience Cloud site, or Lightning app.