.avif)
How to Add Custom Fields to Your Store Locator: Step-by-Step Guide

Adding custom fields to your store locator is a powerful way to improve your customers’ experience and boost your local SEO rankings. By including detailed info like parking availability near downtown [city], wheelchair accessible stores in [neighborhood], and downloadable price lists for [city] locations, you help potential visitors find exactly what they need. Here’s a step-by-step guide on how to do it right.
Step 1: Plan Your Custom Fields for Maximum Impact
Start by listing what information your customers want when searching for locations, such as:
- “Stores with free parking near [city center]”
- “Restaurants with braille menus in [city]”
- “Boutiques with EV charging stations in [postal code]”
- “Hardware stores offering downloadable price lists in [city]”
Group these into two categories:
- Default custom fields - automatically added to every location for consistent info.
- Individual custom fields - unique data tailored to each store location.
Step 2: Create Default Custom Fields List
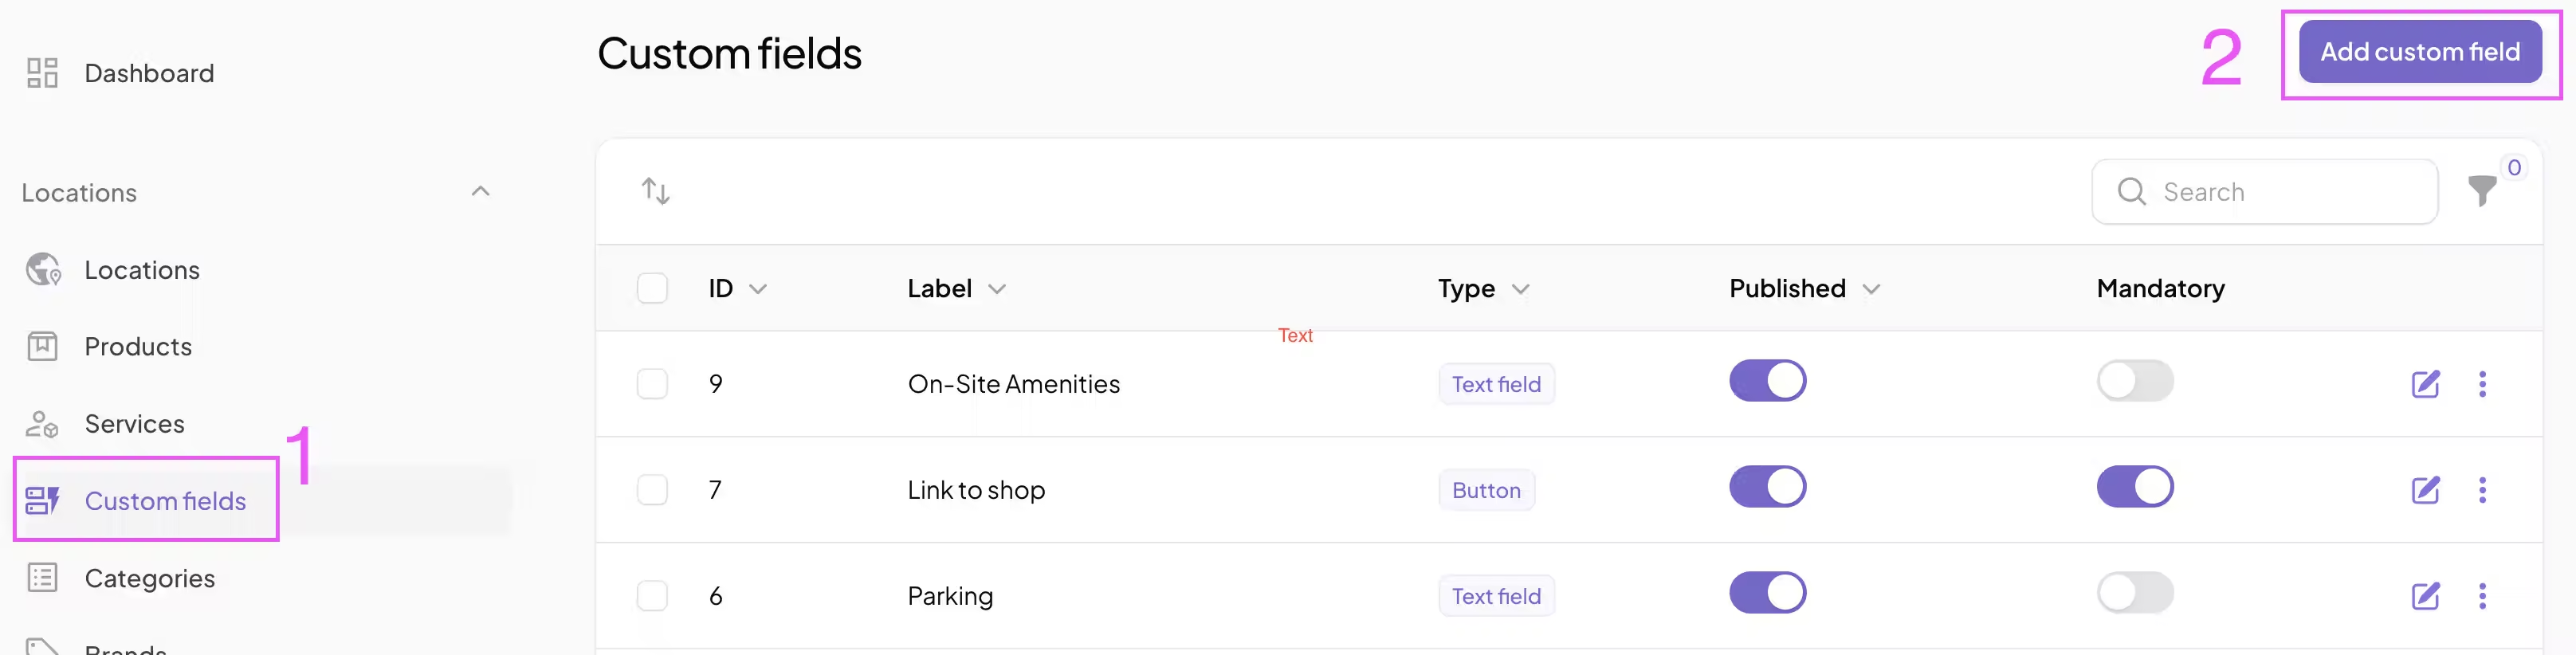
In your store locator’s admin panel , navigate to the Custom Fields **(1) section and add fields **(2) such as:
- Parking options (e.g., “Free covered parking near [city center]”)
- Accessibility features (e.g., “Wheelchair ramp available in [neighborhood]”)
- Downloadable catalogs (e.g., “Downloadable price list PDF for [city] hardware stores”)
- Languages spoken (e.g., “Spanish-speaking staff in [city]”)
Choose field types carefully— text fields, buttons (URL links)—to fit the data format. These default fields ensure all locations have basic, SEO-optimized info that matches common search phrases.
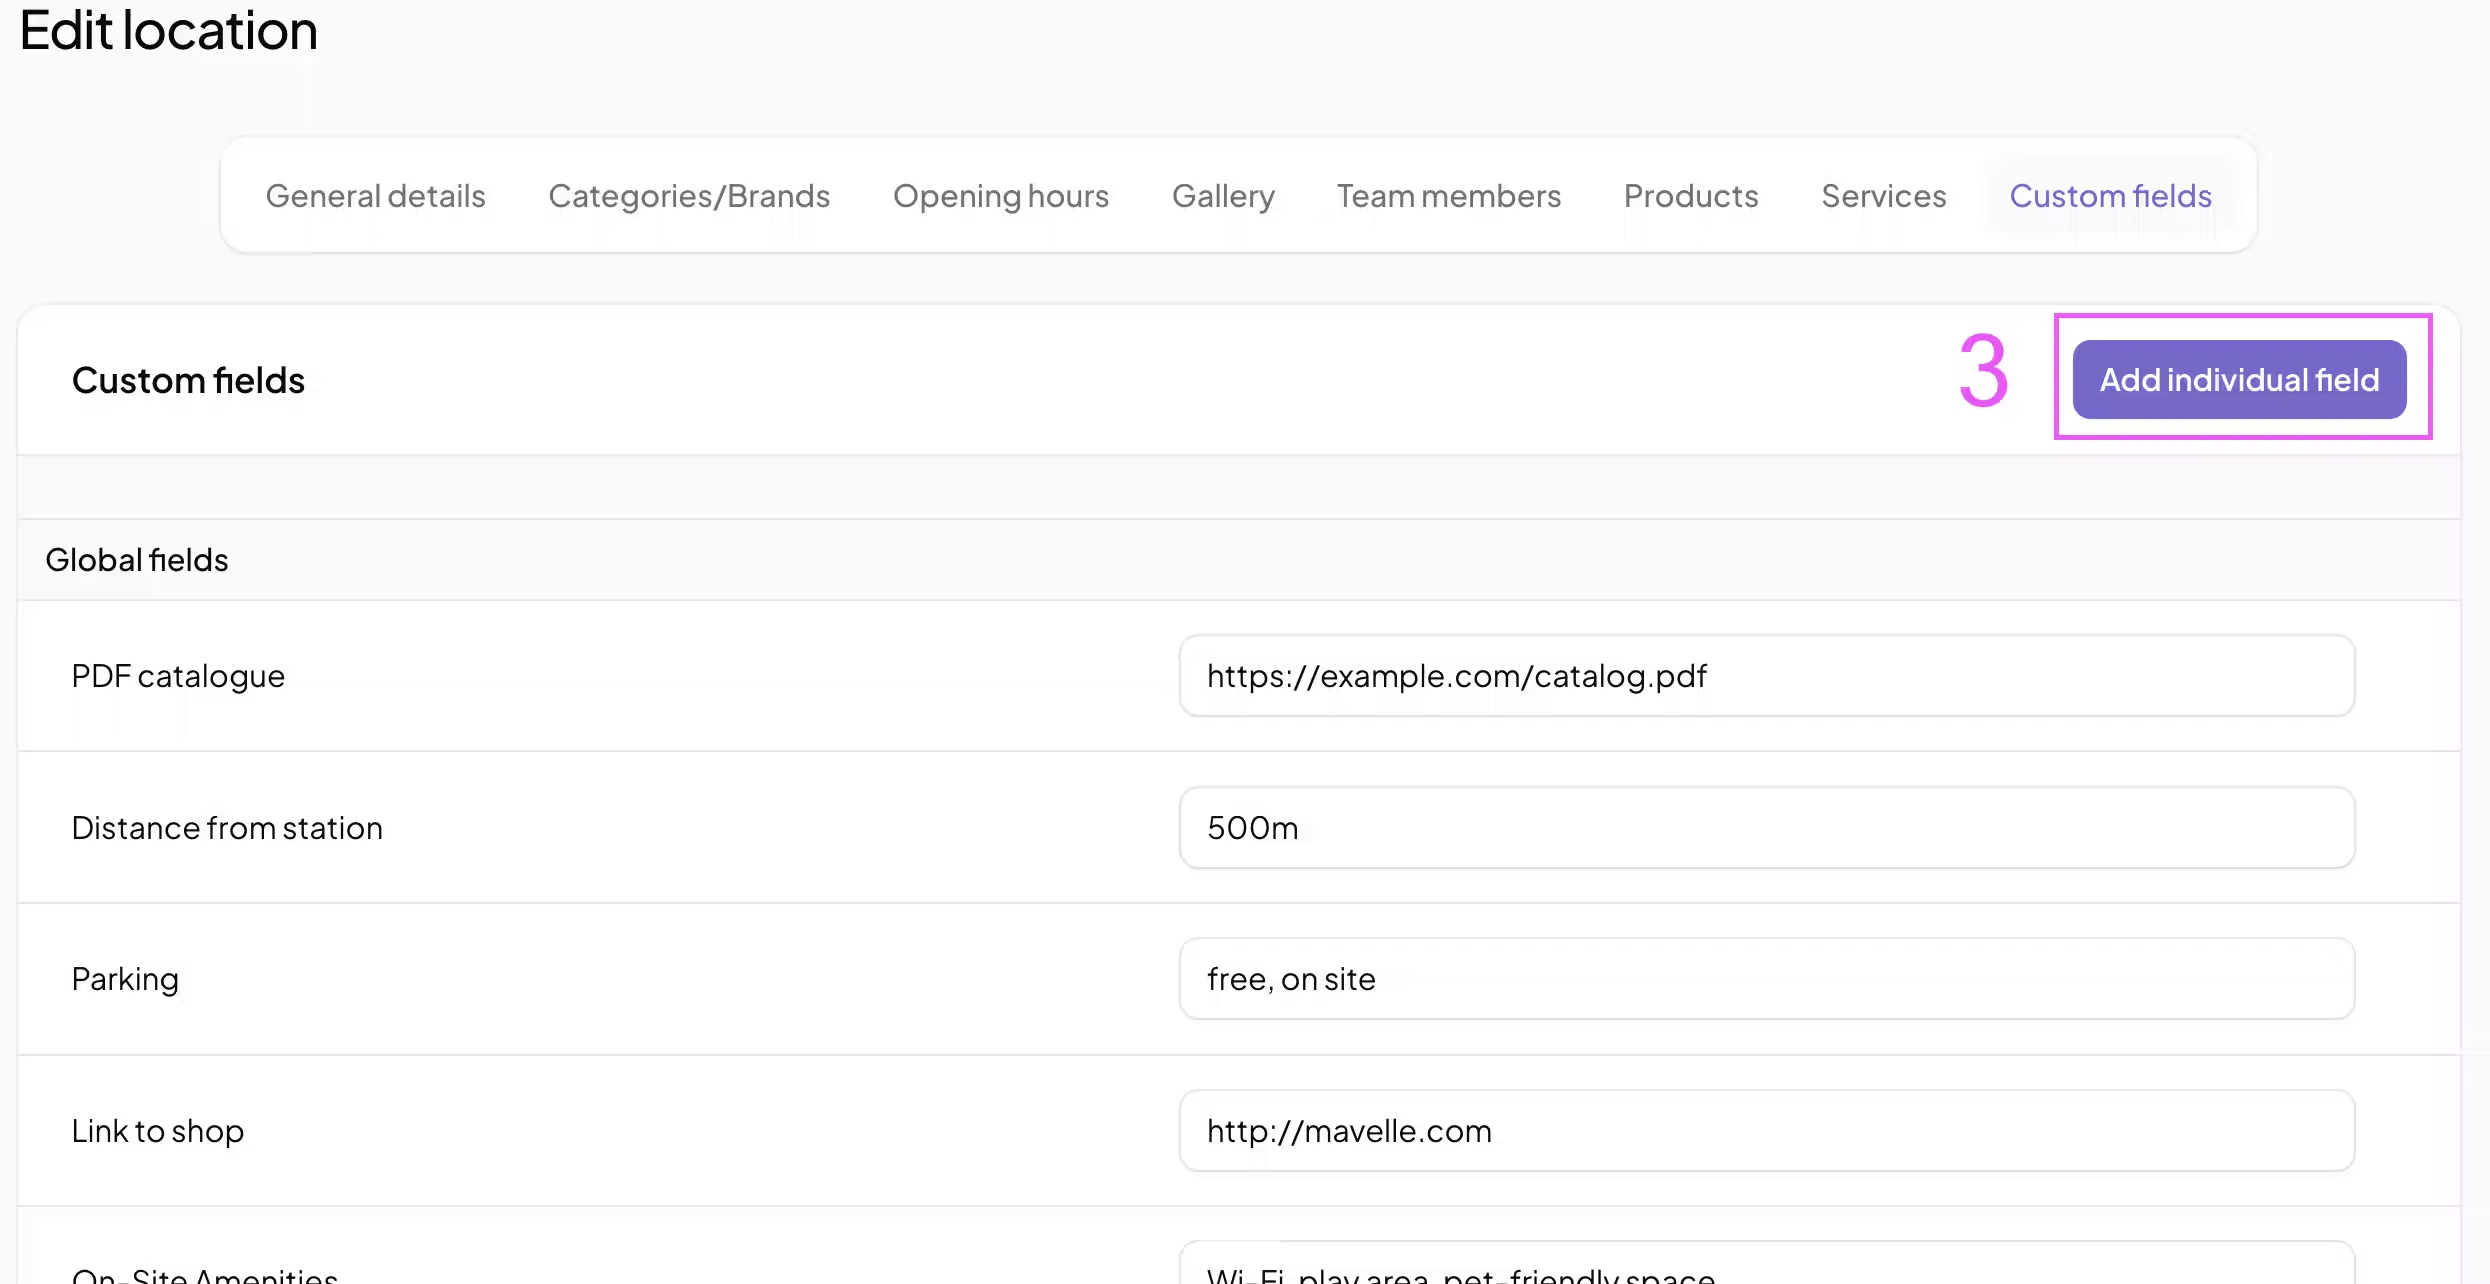
Step 3: Add Individual Custom Fields to Specific Locations (If needed)
Next, if you want, customize individual locations with more precise details to highlight unique offerings **(3):
- “Free EV charging station at our [neighborhood] boutique”
- “Braille menus available at the [landmark]-adjacent restaurant”
- “Street parking only for [city] downtown location”
- “Downloadable vegan menu PDF for [city] café”
Update each store’s custom fields in the admin panel to reflect these unique offerings, improving local relevance and helping your store show up for long-tail searches.
Step 4: Display Custom Fields on Your Store Locator Frontend
Make sure these custom fields are clearly visible on each location’s profile. For example:
- Parking: “Free covered parking available near [city center]”
- Accessibility: “Wheelchair accessible entrance with ramp”
- Downloads: [Download our product catalog PDF]
- Languages: “Staff speak English and Spanish”
This transparency builds trust and improves user experience—plus, search engines will index this valuable, localized content.
Step 5: Optimize Custom Fields for SEO and User Experience
Use natural, location-specific language to include popular long-tail keywords such as:
- “Stores with free parking near downtown [city]”
- “Wheelchair accessible bakery in [city] with step-free entrance”
- “Kids-friendly restaurant with play area in [city]”
- “Downloadable price list from hardware store in [city]”
Ensure your custom fields answer what customers search for, increasing your chances of ranking higher in local search results.
Bonus Tip: Maintain and Update Your Custom Fields Regularly
Keep your store locator data fresh by:
- Reviewing and updating parking or accessibility info as needed
- Adding new downloadable PDFs for seasonal menus or catalogs
- Tracking which custom fields attract the most visitors and optimizing accordingly
By following these steps and adding as many custom fields as you want, you can create a fully customized, SEO-optimized store locator that meets your customers’ exact needs and drives more local traffic.
Ready to drive real results
See how MapCosmos transforms browsers into customers with a live walkthrough.